How to control a vibration test in EDM using a Python MQTT client
Introduction
MQTT is an OASIS standard messaging protocol for the Internet of Things (IoT). It is designed as an extremely lightweight publish/subscribe messaging transport that is ideal for connecting remote devices with a small code footprint and minimal network bandwidth.
Users can monitor the status of environmental tests (vibration, temperature, humidity) operating in EDM VCS, measurements taken in EDM DSA, and remotely located tests by implementing MQTT in EDM.
The purchase of Crystal Instruments MQTT extension for EDM includes three coding languages, a client demo program, and scripts, such as C#, Python and LabVIEW. This article focuses on the various components of the Python scripts. For more details, please refer to the EDM MQTT Technical User Manual.
MQTT Python Demo Client Script
An API was created in Python to abstract away the specific commands that MQTT requires to communicate with EDM. Our Python API provides utilities and allows users to create readable scripts for automating tests in EDM. Instead of requiring the user to be familiar with how to set up publishers and subscribers, the user can simply import our Python module and call functions. This API script uses a package called Paho MQTT that can be installed using the following command:
pip install paho-mqtt
The Python side is segmented broadly into two sections – the module/API and the user-level scripts. The user-level scripts are very customizable, allowing the user to execute any number of functions in any desired sequence. Users are also provided access view and edit the API code.
Module / API
|
from paho.mqtt import client as mqtt_client import numpy as np |
The MQTT client constructor with parameters that determine the connection to a MQTT broker. The constructor also sets up topics and some variables.
|
def __init__(self, brokerIP="127.0.0.1", port=1883, username='Admin', password='123456'): # Setup variables that are common to pub and sub self.broker = brokerIP self.port = port self.username = username self.password = password
# Setup publisher self.pubgeneraltopic = "EDM/App/Test/Command" self.pubVCStopic = "EDM/VCS/Test/Command" self.pubDSAtopic = "EDM/DSA/Test/Command" self.pubclient_id = 'python publisher' # Setup subscriber # There can be multiple subscriber topics self.subtopics = ["EDM/App/Test/SignalData", "EDM/VCS/Test/SineStatus", "EDM/App/Message", "EDM/DSA/Test/SignalData", "EDM/DSA/Test/DSAStatus", "EDM/App/System/Status", "EDM/App/System", "EDM/App/Status", "EDM/App/Test/Status"]
self.subclient_id = 'python subscriber'
# Connect subscriber and publisher # Should this be handled in main script? maybe self.pubclient = self.connect_mqtt(self.pubclient_id) self.subclient = self.connect_mqtt(self.subclient_id) self.subscribe(self.subtopics)
self.data = 0 # Look Up Table (LUT) # Lookup table / dictionary handles storing multi-topic data # Topic string is the key, data stored in value self.LUT = {} self.blocksize = 2048 self.samplerate = 102400 self.freqrange = self.samplerate * 0.44 self.freqresolution = 2 self.freqs = [] self.initLUT = False self.amplitudes = np.zeros((self.blocksize))
self.verbose = False |
The MQTT client connection method is used in the constructor above.
|
def connect_mqtt(self, client_id): ''' Input client_id to have one fxn for both sub and pub ''' def on_connect(client, userdata, flags, rc): if rc == 0: if self.verbose: print("Connected to MQTT Broker!") else: print("Failed to connect, return code %d\n", rc) # Set Connecting Client ID client = mqtt_client.Client(client_id) client.username_pw_set(self.username, self.password) client.on_connect = on_connect client.connect(self.broker, self.port) return client |
The MQTT client publish method to send topics and messages to other clients or broker. Since this method will be commonly used, it would be best to set up topic name functions that are shown at the end of this section.
|
def publish(self, pubtopic, msg): #msg = f"messages: {msg_count}" result = self.pubclient.publish(pubtopic, msg) # result: [0, 1] status = result[0] if status == 0: if self.verbose: print(f"Sending '{msg}' to topic '{pubtopic}'") else: print(f"Failed to send message to topic {pubtopic}") |
The MQTT client on message received method for when another client or broker sends back a response.
|
def on_message(self, client, userdata, msg): #print(f"Received `{msg.payload.decode()}` from `{msg.topic}` topic") if self.verbose: print(f"Received message from '{msg.topic}' topic") self.data = msg.payload.decode() self.LUT.update({f"{msg.topic}" : self.data})
if not self.initLUT: try: self.blocksize = self.samplerate = self.freqrange = self.samplerate * 0.44 self.freqresolution = self.samplerate / self.blocksize / 2 self.freqs = [i*self.freqresolution for i in self.amplitudes = np.zeros((self.blocksize)) self.initLUT = True if self.verbose: print("LUT initialized successfully") except KeyError: if self.verbose: print("Key does not exist yet") |
The MQTT client subscribe method for the current client to receive data. Most important topics are subscribed in the constructor.
|
def subscribe(self, topics): for topic in topics: self.subclient.subscribe(topic) self.subclient.on_message = self.on_message |
Below are some example topic functions that user level scripts can use to send commands to EDM.
|
def connect(self): ''' Connect to the Spider ''' self.publish(self.pubgeneraltopic, 'Connect')
def get_APS(self, chan): ''' Get the APS for channel number 'chan' ''' self.publish(self.pubgeneraltopic, 'RequestSignalData;APS(Ch' + str(chan) + ')') |
Running a Test Script
The import modules for an example script.
|
import mqtt import time import numpy as np import datetime import os import matplotlib.pyplot as plt |
The initial connection of the python MQTT client to the EDM MQTT broker via the paho-mqtt package pubsub method. There is the time.sleep method occasionally placed throughout the example script to let the MQTT network, spider device and EDM to process data and send back and forth messages.
After that are a couple of examples of data that EDM sent back to the python client, as well as creating a save directory to save XYZ values of a signal frame in numpy.
|
# Connect to MQTT Broker mqttClient = mqtt.pubsub(brokerIP = "192.168.1.123") mqttClient.subclient.loop_start()
# initial sleep is needed to get system status messages time.sleep(2)
# Get date to use it for save folder name now = datetime.datetime.now() dt_string = now.strftime("%Y-%m-%d--%H-%M")
softwareMode = mqttClient.LUT['EDM/App/Status'].split("SoftwareMode")[1].split(",")[0][3:-1] serialnumber = mqttClient.LUT['EDM/App/System'].split("SerialNumber")[1].split(",")[0][3:-1] devicetype = mqttClient.LUT['EDM/App/System'].split("DeviceType")[1].split(",")[0][3:-1]
savedirectory = softwareMode + "-" + devicetype + "-" + serialnumber + "-" + dt_string
print(savedirectory)
# Create save folder # 'dir' is windows equivalent of 'ls' on linux, lists files in the directory r = os.system("dir " + savedirectory) # if the directory does not exist, r will be 1 - create it before continuing if r == 1: os.system("mkdir " + savedirectory) |
Then the python client will connect and run a test in EDM. If it is a Random test with a pre-test, the next code block will wait for user input when the pre-test is finished. Once the input has been received, the python client will proceed with the test, wait, and assign a test status to a variable.
|
# Connect and run a EDM test mqttClient.connect() mqttClient.run()
r = input("\nPress enter once pre-test is done") # any other key followed by enter will exit, or ctrl-c will exit if r != '': exit()
# Start test after pre-test mqttClient.proceed() time.sleep(2)
testStatus = mqttClient.LUT['EDM/App/Test/Status'].split("Status")[1].split(",")[0][3:-1] |
Now the python client will start requesting signal data as long as the test status is running.
|
signalFrame = [] count = 0 plt.ion()
try: while(testStatus == "Running"): # Request signal data, such as Channel 1 mqttClient.get_channel_data(1) # Wait for receiving and parsing message # Change time to receive data in real time or occasional updates time.sleep(0.01) # Refresh graph to view the current signal frame # or comment it out to have a time history graph of the signal plt.clf() |
After the signal data has been received, the python client will process it to be readable by using numpy.
|
## Parsing the received message ## signalName = mqttClient.LUT['EDM/App/Test/SignalData'].split("ValueX")[0].split("Name")[1].split(",")[0][3:-1] signalUnitX = mqttClient.LUT['EDM/App/Test/SignalData'].split("ValueX")[0].split("UnitX")[1].split(",")[0][3:-1] signalUnitY = mqttClient.LUT['EDM/App/Test/SignalData'].split("ValueX")[0].split("UnitY")[1].split(",")[0][3:-1]
Xvalues = mqttClient.LUT['EDM/App/Test/SignalData'].split("ValueX")[1].split("ValueY")[0].split("ValueZ")[0][3:-3] X = Xvalues.split(",") X = np.fromiter(X, float)
Yvalues = mqttClient.LUT['EDM/App/Test/SignalData'].split("ValueX")[1].split("ValueY")[1].split("ValueZ")[0][3:-3] Y = Yvalues.split(",") Y = np.fromiter(Y, float)
Zvalues = mqttClient.LUT['EDM/App/Test/SignalData'].split("ValueX")[1].split("ValueY")[1].split("ValueZ")[1][3:-3] Z = Zvalues.split(",") Z = np.fromiter(Z, float)
signalFrame.append(X) signalFrame.append(Y) signalFrame.append(Z)
thd = np.array(signalFrame) |
Below is an example of printing out and saving the values from the signal frame.
|
## Print Statements for displaying points of the signal frame ## # columnlabelstring = "X Values || Y Values || Z Value" # print("\n" + " " * (len(columnlabelstring)//4) + "Signal Frame Data\n" + "-" * len(columnlabelstring)) # print(columnlabelstring + "\n")
# nspace1 = 5 # nspace2 = 11 # nspace3 = 13
# for x in range(len(signalFrame[0] / 4)): # print(" "*nspace1, signalFrame[0][x], " "*nspace2, signalFrame[1][x]," "*nspace3, signalFrame[2][0])
## Save data to .npy files in the created save folder above ## # np.save(savedirectory + "/fullSignalFrame"+str(count)+".npy", thd) # # Save individual slices too # np.save(savedirectory + "/X"+str(count)+".npy", thd[0]) # np.save(savedirectory + "/Y"+str(count)+".npy", thd[1]) # np.save(savedirectory + "/Z"+str(count)+".npy", thd[2])
# print("\nSaved .npy files to ", savedirectory) |
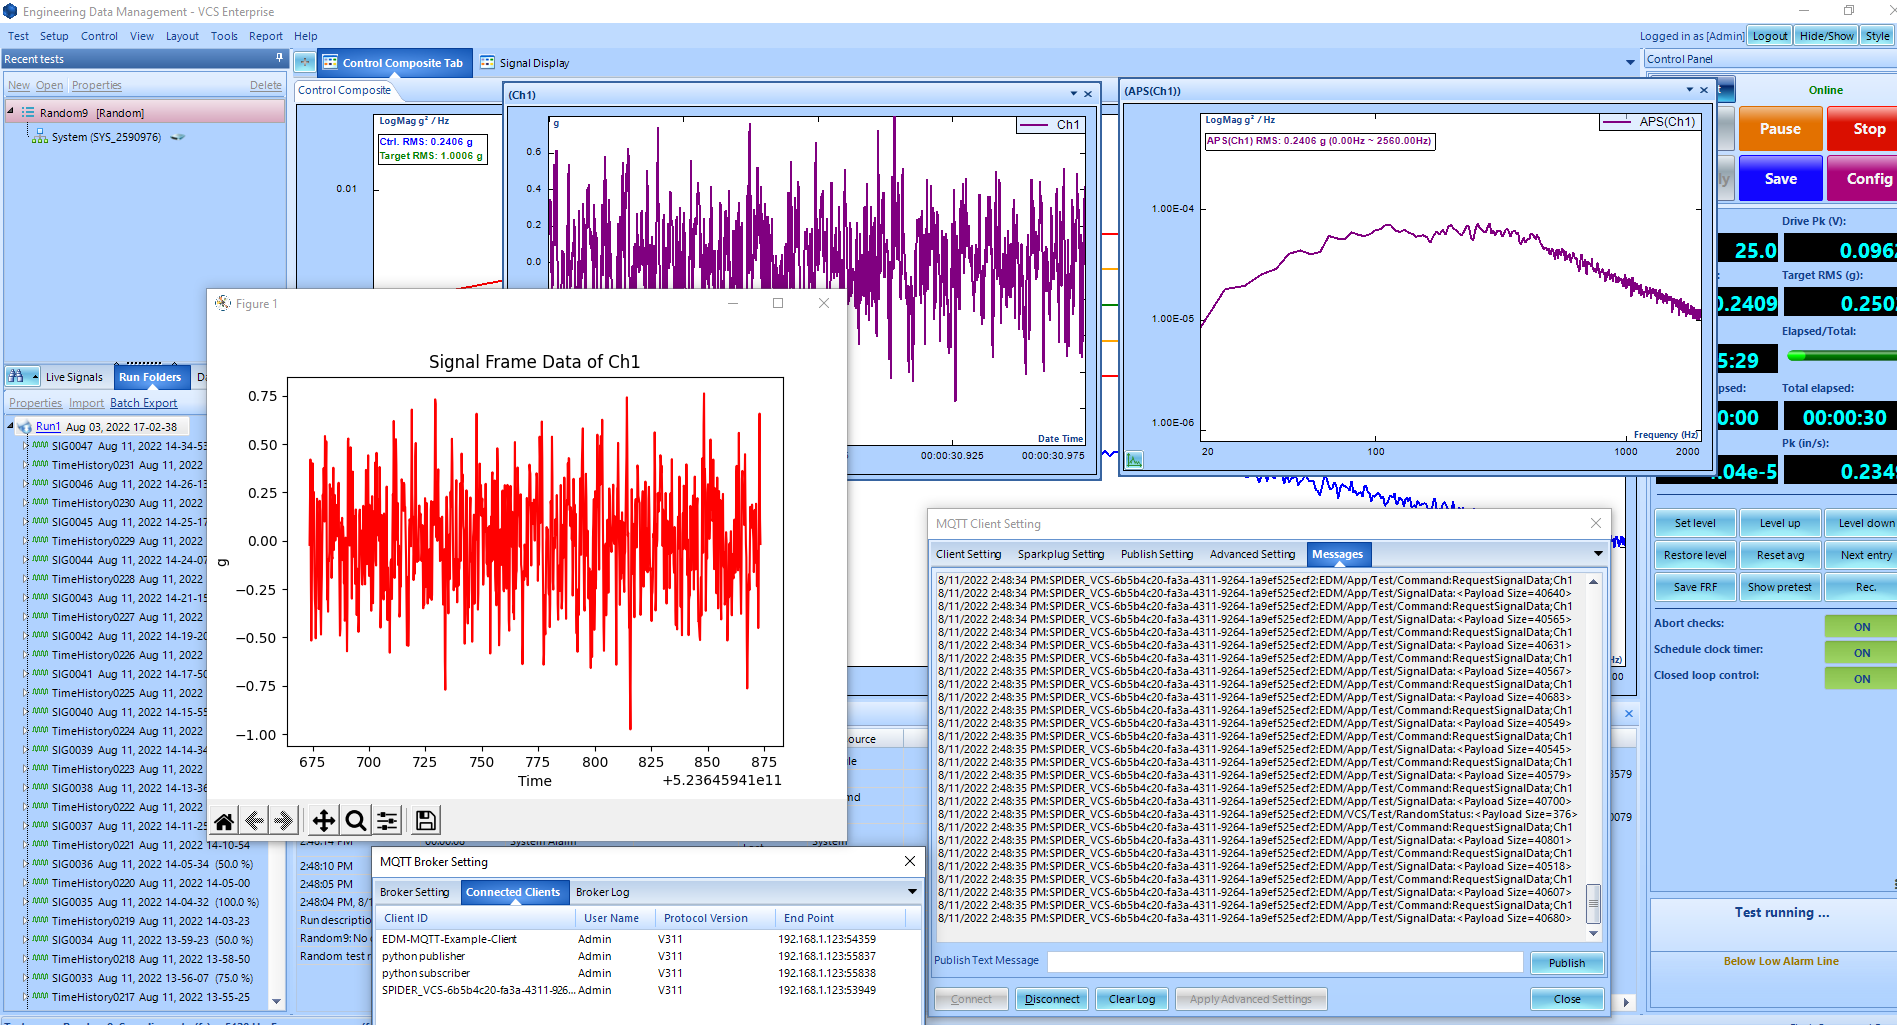
Below is an example of generating a plot from the received signal frame data.
|
## Generate plot ## # Adjust the X values for time domain signals # comment out for frequency domain signals thd[0] = thd[0] - thd[2][0]
plt.plot(thd[0], thd[1], 'r', label=signalName) plt.title("Signal Frame Data of " + signalName) plt.xlabel(signalUnitX) plt.ylabel(signalUnitY) plt.draw() # plt.savefig(savedirectory + "/"+signalName+"-plot"+str(count)+".png") plt.pause(0.001)
|
If the script was printing and saving the signal frame, it would increment the count. And it will check the test status to see if it is still running.
|
count += 1 testStatus = mqttClient.LUT['EDM/App/Test/Status'].split("Status")[1].split(",")[0][3:-1]
except KeyboardInterrupt: print('Keyboard Interrupt received -- exiting main loop')
# For any interruption from the python script, stop the test mqttClient.stop()
try: mqttClient.subclient.loop_stop() print("MQTT loop stopped successfully") except: print("Failed to stop subscriber loop") |